
Even if worms make you squirm, the benefit that these squishy invertebrates have on gardens is undeniable. Worm waste, or “castings,” are incredibly rich in vitamins and nutrients that help plants thrive.
You can harness the soil production capabilities of worms to create a rich nutrient supplement for plants through a process known as “vermicomposting.” Starting your own “worm bin” for vermicompost is relatively inexpensive, simple and your plants will be thanking you in a matter of months.
What are the benefits of vermicomposting?
Like thermophilic composting, which uses heat-loving bacteria to break down biological waste, vermicomposting is a great way to recycle your old table scraps into usable fertilizer. While thermophilic composting is slightly more sterile, the advantage to vermicomposting is that it is more stable than thermophilic composting, and the product is slightly more potent.
“What you produce has a more profound effect on plants. It leads to greater growth, faster seed germination, better root development and increased yields,” said Rhonda Sherman, director of the Compost Learning Lab at North Carolina State University. “It can also depress attacks by pests and diseases.”
It is also, literally, more valuable. According to Sherman, if you were to manufacture and sell thermophilic compost, it would sell for about $35 per cubic yard; vermicompost, on the other hand, sells for about $200 per cubic yard.
What are the best worms for vermicomposting?
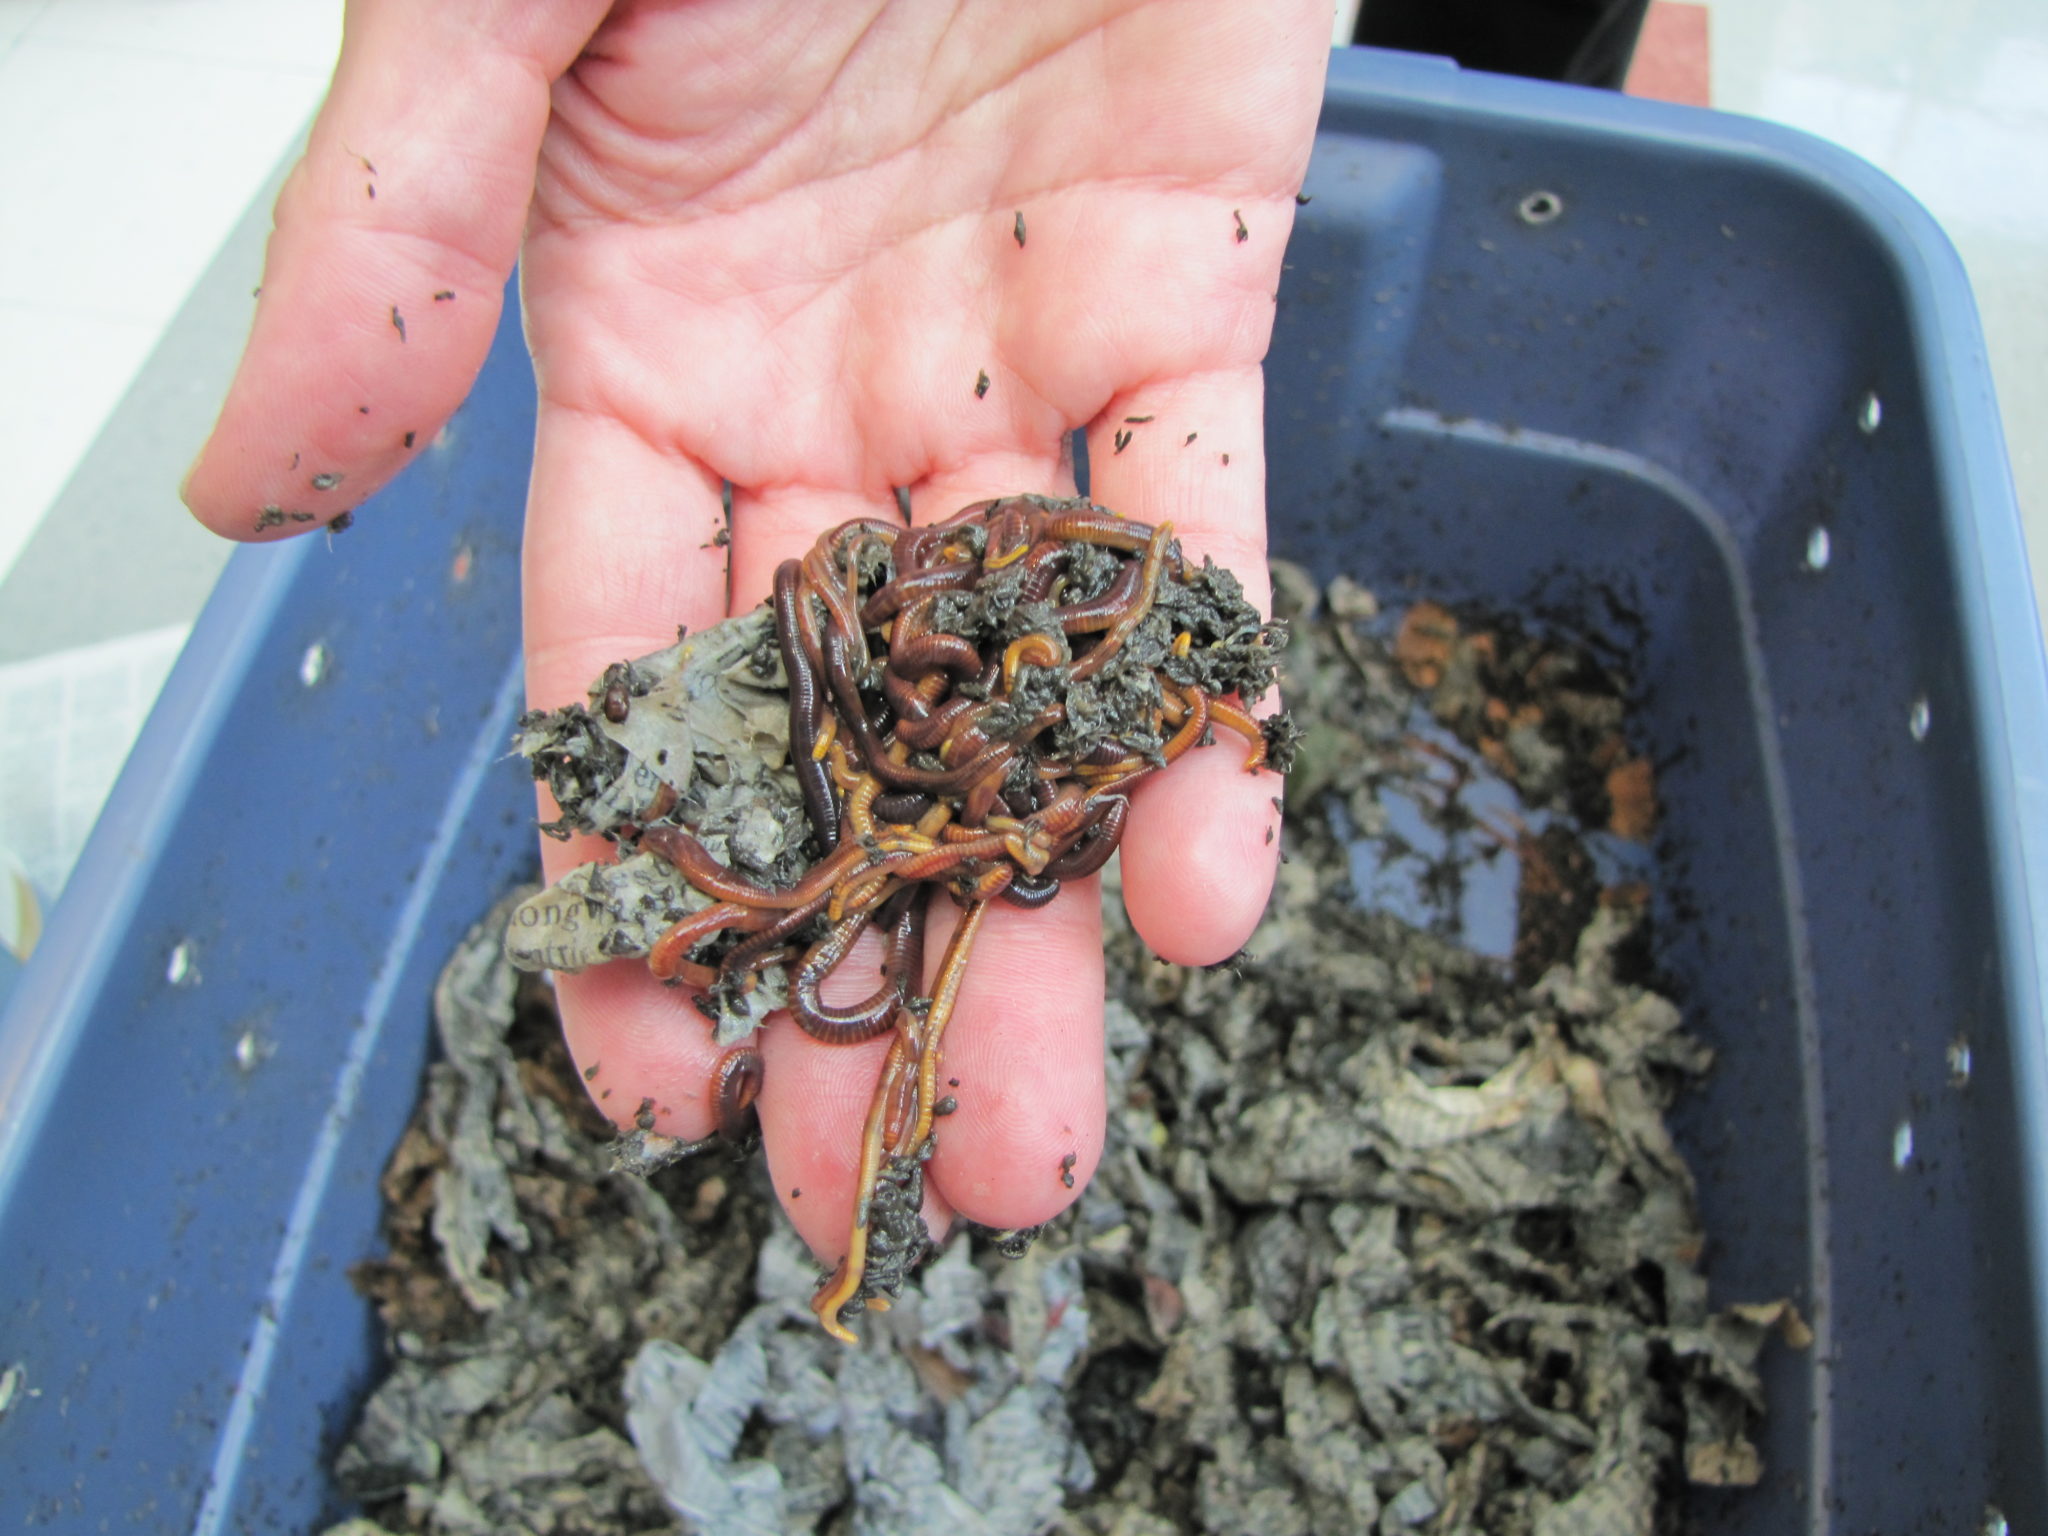
“It’s important that people start with the right earthworm,” Sherman said. According to Sherman, there are thousands of species of earthworms, but only seven species have been identified as suitable for vermicompost. Out of those, one that reigns supreme: Eisenia
Sherman recommends starting with one pound of worms, which is about 1,000 worms, which should cost between $25 and $30. Buy them from a worm grower instead of a bait shop so you know exactly the species you are getting.
How to set up a vermicompost bin
Though there are large-scale vermicomposting operations, the things you need to start a worm bin in your home should only cost just over $30: a pound of worms, a plastic bin and old newspaper.
Once you have the worms, set them up in a plastic bin (between 14 and 18 gallons is a good size for 1,000 worms) with air holes drilled into the upper sides of the bin. Fill the bin halfway with bedding — newspaper shredded into strips, slightly soaked in water for 10 minutes and wrung out, should do — and add the worms to their damp new home.
Keep the worms at room temperature in a moist environment. “They don’t have lungs — they breathe through their skin, and it has to be moist, but you don’t want it mushy wet,” Sherman said. “A lot of people put too much moisture in the bin, and that can cause problems.”
Regularly spritz water on the bedding to keep it moist, but never pour water directly into the vermicompost or else it will begin to smell and may leak out of the bottom of the bin. The earthworms will eat the bedding along with the food discards, so you will need to add more every couple of months.
You can keep your worm bin in the kitchen, closet, or laundry room. “People put it all over the place in their house,” Sherman said. “With a lid, you don’t smell anything and you don’t hear anything. People have made lovely coffee tables out of worm bins.”
Feed the worms food scraps from your kitchen, except meat, fish, bones, dairy and citrus. One pound of red wigglers will eat up to two pounds of food scraps a week. Cut the scraps into small pieces, dig a hole using a hand-sized three prong tool and add the food scraps to the depression in a layer about an inch high. Cover with bedding to keep fruit flies away. Once the scraps disappear — check after about a week — you can add more food. The worms and other microorganisms will eventually consume the scraps completely.
The castings will look like fine coffee grounds and smell like earth. If the conditions are right, it should take between three and six months for there to be castings to harvest.
Castings will gather at the bottom of the bin, and you can use several different techniques to harvest them. Feed the worms on one side of the bin until they congregate on that side. Then sift the bedding from one side through a fine-mesh screen, or gather the castings by hand from the bottom of the bin; repeat on the other side. You can also turn over the entire contents of the bin onto a shower curtain or plastic tablecloth in an area with high levels of light. After a few minutes, the worms will move down through the bedding to escape the light, and you can scrape the castings off the top of the pile.
You can also invest a little more preparation to ease the harvesting process: before you begin vermicomposting, you can buy two identical bins and drill holes in the bottom of both bins. Vermicompost in one of the bins for two or three months, and then place the other bin on top of the bedding in the first. Add food to only the top bin; eventually, the worms will migrate to the top bin and you can harvest castings from the bottom bin (you can also buy a manufactured stacking bin designed for this purpose).
Unlike thermophilic compost, vermicompost is stable and can be used right away to mix into your soil or dress your plants. But use sparingly. “It is very potent so you don’t want to use much,” Sherman said. “If you were making a soil mix, [you] only want vermicompost to be up to 20 percent of the mix.”
Vermicompost is an easy-to-manage alternative to thermophilic compost, and a small worm bin is a valuable investment for a productive garden.
[…] said that both regular compost and vermicompost are complementary to raising black soldier fly […]