
Easter is a time to celebrate the bounty of spring. What better way than to use fresh fruits and vegetables to dye your Easter eggs with your family? Natural Easter egg dye can give eggs unique coloring perfect for the holiday.

Most conventional supermarket Easter egg coloring kits are made from synthetic dyes. While the scientific research about the potential impacts of these chemicals on human health is not robust, certain colorings like tartrazine, which is used for bright yellow colors, have been shown to cause neurological issues as well as liver and kidney tissue damage in rats.
Luckily, there is a wide range of colors naturally found in household fruits, vegetables and spices that can be extracted to color Easter eggs.
There are a number of great DIY natural Easter egg dye recipes and tips from websites and bloggers around the web, including The
Natural Easter egg dye, step by step
Though there are slight variations in the different recipes, the basic steps are the same.
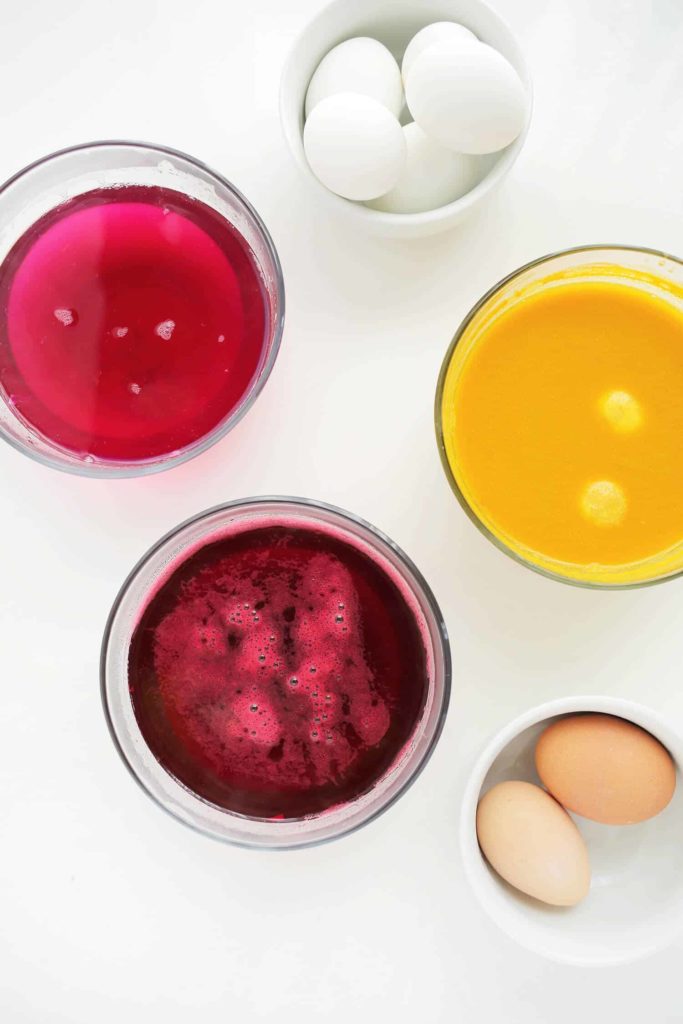
- Hard boil the eggs and let them cool. White eggs will show more vibrant colors than brown eggs, though the latter can produce warm, rustic hues.
- Gather the organic materials for the colors that you want. Here are some suggestions from around the blogosphere:
- Pink – shredded beets
- Lavender – red onion skins
- Red – paprika
- Orange – yellow onion skins
- Yellow – turmeric
- Blue – shredded purple cabbage
- Green – spinach
- Blue-gray – blueberries
- Purple – beet kvass
- Put the coloring materials in individual saucepans of water — one cup of water for every cup of fruit, vegetables or spices should do — and place them on your stove top burners. Bring the water to a boil, and then reduce the heat and let simmer for 15 to 30 minutes. You can test the intensity of the color by putting a drop on a white plate.
- Let the solutions cool, pass them through a fine-mesh strainer to remove the organic material and add a tablespoon of white vinegar to each to bring out the color.
- Transfer the solutions to medium-sized bowls or jars. Submerge the eggs. One cup of solution should color about three eggs.
Dyeing eggs with natural dye will take longer than their synthetic chemical counterparts. Soak your eggs for at least a few hours, and check periodically to see if the color is to your liking. The Kitchn recommends dipping the eggs in and out of the solution several times, allowing the dye to dry between dips, in order to get the color to your liking. A Beautiful Mess suggests keeping the eggs in the solution in the refrigerator overnight for rich, bright colors.
Your naturally dyed Easter eggs will emerge from the solution with a lovely matte finish, but if you are more inclined towards shiny eggs, rub the shells with a little bit of vegetable oil to give it a nice sheen.
Even if they are not as fluorescent as their synthetic counterparts, the natural dyes will create a beautiful spectrum of colorful eggs for your annual scavenger hunt.