
Herbs grow so bountifully that it seems near impossible to use them all before they spoil. Drying herbs is an easy way to preserve herbs for later use. The following is an excerpt from “Simply Living Well: A Guide to Creating a Natural, Low-Waste Home” by Julia Watkins takes you through the basic steps of drying herbs.
If you’ve ever grown herbs, you’re probably accustomed to having more than you can possibly use in one season. Luckily, you can dry them and enjoy the bounty of summer all year long. If you harvest, dry, and store them properly, herbs can retain their flavor and medicinal value for up to a year. Here are a few tips:
Harvest
It’s important to harvest herbs at the right time. Pick after the flower buds appear but before they open, when the plant has the highest concentration of essential oils. It’s also best to pick them in the morning, after the morning dew has evaporated but before the sun gets too hot.
Clean
Unless you plan to use them immediately, it’s best to avoid washing herbs, as dampness promotes the growth of yeast and mold. Instead, remove old, dead, or wilted leaves by hand and clean by shaking or brushing away debris. Use organic gardening practices so you don’t have to worry about washing off chemicals.
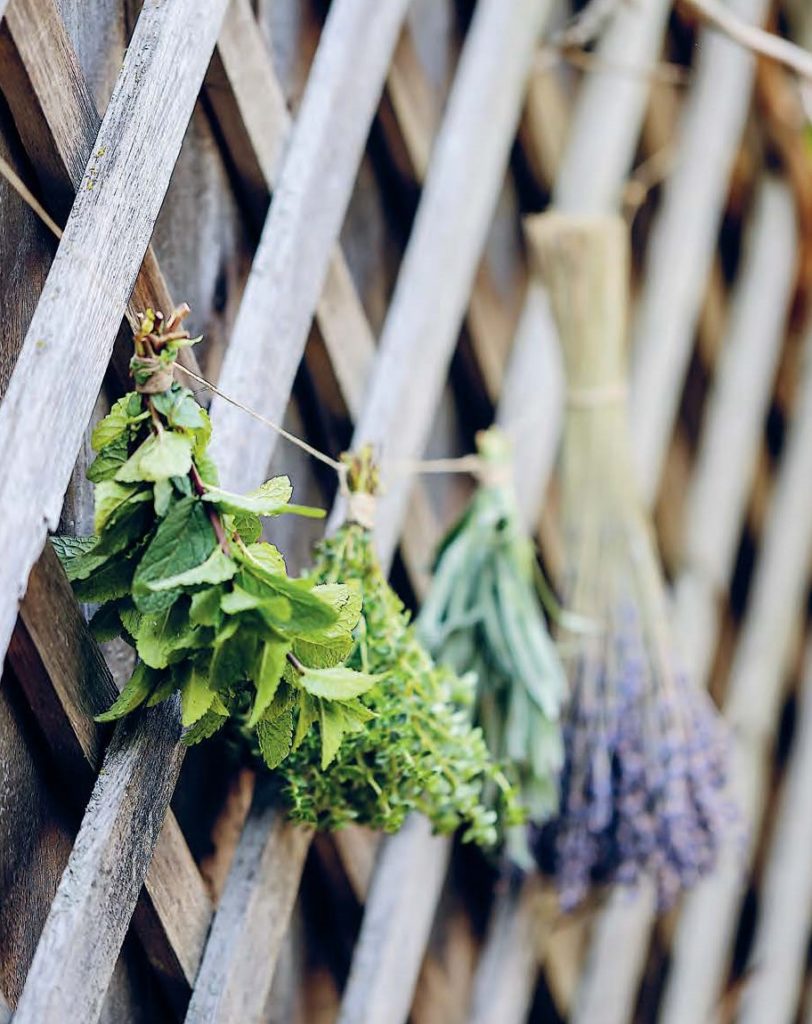
Dry
Air-drying works best for herbs with a low-moisture content, such as bay leaves, while freezing works best for herbs with a high-moisture content, such as basil. For low-moisture herbs, dry them in the dark with good air circulation and temperatures below 110°F. You can use a food dehydrator (set between 90° and 110°F), flat baskets, clean window screens, or clothes drying racks. Although it might seem like a good shortcut, microwaves and conventional ovens should be avoided, as they tend to cook and destroy the quality of herbs. You can also tie up herbs in bundles of 4 to 6 stems and hang them upside down to dry. To prevent contamination and oxidation, it’s crucial to take down the bundles and store them as soon as they’re dry — you’ll know they’ve finished drying when you can crumble them easily in your hand.
Store
Whole leaves and seeds retain oils better in storage than crumbled herbs or ground seeds. You can certainly use a mortar and pestle to grind your herbs, but bear in mind that they may not retain their quality as long. They tend to retain their flavor best if kept whole until you’re ready to use them. Either way, store dried herbs in airtight containers out of direct sunlight and away from heat. Label jars immediately with the date and contents. You can tell if an herb is still valuable by its appearance, smell, and effectiveness. As the herbalist Rosemary Gladstar says, it should look, smell, and work just as it did on the day it finished drying. When using dried herbs in cooking, keep in mind that dried herbs are more concentrated than fresh. Generally speaking, if a recipe calls for 1 tablespoon fresh herbs, you should substitute 1 teaspoon crushed dried herbs.
This, “Drying herbs,” is an excerpt from “Simply Living Well: A Guide to Creating a Natural, Low-Waste Home” by Julia Watkins. Used with permission of the publisher, Houghton Mifflin Harcourt.
Living in SoCA w/heat & sun, I dry herbs hanging around edges of my covered back porch…but I don’t want dirt (we’re dry & dirt travels in winds) & bugs to get into my produce, so I’ve used old nylon hosiery, or mesh bags fr grocer’s produce, to encase my herbs while drying to help keep pests & dirt out. You can use other sheer fabrics over, for instance, a hanging egg basket, etc. My grandmother told me that she dried corn (cut fr cob) on a window screen in her day. 🙂 Drying is easiest way to preserve. My scouting friends dried tomato paste into tomato-leather strips to take on long camps/hikes–no refrigeration needed. .
Extra tip…..a few years, I’ve had too many tomatoes…even AFTER making crockpot tomato jam…which takes a ton…& so, I figured, if a parked car can get so hot as to be dangerous to dehydrate/kill humans & pets in a matter of minutes by dehydration/heat exhaustion…it ought to be able to dry my tomatoes (I have an electric dryer & it takes HOURS even a day b/c of the water content of tomatoes). So, I trim tomatoes into quarters (1/4-of a golf ball-size for small…or cut a big one up proportionately) , place pieces on a rack positioned over big pan (like a broiler or cookie sheet), lightly salt…(you can add herbs, too…..dill, parsley, fresh chopped basil…..) & I set this in the back window of one of my cars parked in the driveway. It works so fast that you have to be careful in really sunny/hot places….check every 2 hrs or so visually. You want “leather dry” & not “bar-b-q dry” (which has happened to me before). To be safe, I put my results into sandwich-sized baggies & pop them into the freezer (don’t want a chance of mold). Bushels of tomatoes can be dried this way & take up so little space in either the freezer or in olive-oil suspension in your fridge or pantry, depending upon how fast you plan to use them. I use them all year by the handful in soups, frittatas, fried rice, scrambled eggs, breakfast burritos, stewed tomato gravies, many Mediterranean white bean/pasta/Swiss Chard dishes….stews, meatloaves, salads, & so on. Your parked car is a “free” drier!