
Forget storebought. With a few simple steps and a short list of ingredients and supplies, homemade yogurt can be yours! Here’s how to make yogurt at home.
Yogurt is one of the few foods that I truly enjoy on a daily basis that is actually good for me. Even better? It’s pretty easy to whip up a week’s worth of it right here at home. All you need are two key ingredients, a good pot, a trusty thermometer, a heat source and clean jars.
Then, by following a few simple steps and exercising a bit of patience, you can enjoy your own healthy snack or meal supplement.
The thing I love most about plain yogurt is it crosses the line from sweet to savory with ease.
It can be enjoyed at breakfast with fruit, honey and a bit of granola or nuts to add some crunch. If honey is not your thing, stir in some pure maple syrup or agave to sweeten it. On its own, plain yogurt can swap places with sour cream as a topping for spicy curry dishes or tacos, thicken soups or stroganoffs or add a healthy punch to pancake batter. Add diced cucumber, lemon juice and garlic to yogurt and you have tzatziki to serve alongside toasted pita chips or atop grilled chicken.
As if all that were not enough, yogurt is high in protein, calcium, vitamins and probiotics — live culture bacteria — that enhance digestive functions in our bodies. It’s good for our muscles, bones, teeth and tummies. Talk about an edible multitasker!
What do I need to make yogurt at home?
Yogurt does not happen quickly. From start to finish it takes between eight and nine hours — most of which is the slow heating process that transforms the liquid ingredients into the thickened final product. So plan accordingly by starting your culture in the morning or at night so you are not caught completing the final step at an inconvenient time.
While there a number of ways to make yogurt, I make mine using an electric yogurt-maker that came with seven convenient single serve glass jars. Yogurt makers like mine [I use the Flexzion automatic yogurt maker which I purchased online] are available from any online kitchen-supply outlet and at most large retail stores with a kitchen section.
How to make yogurt
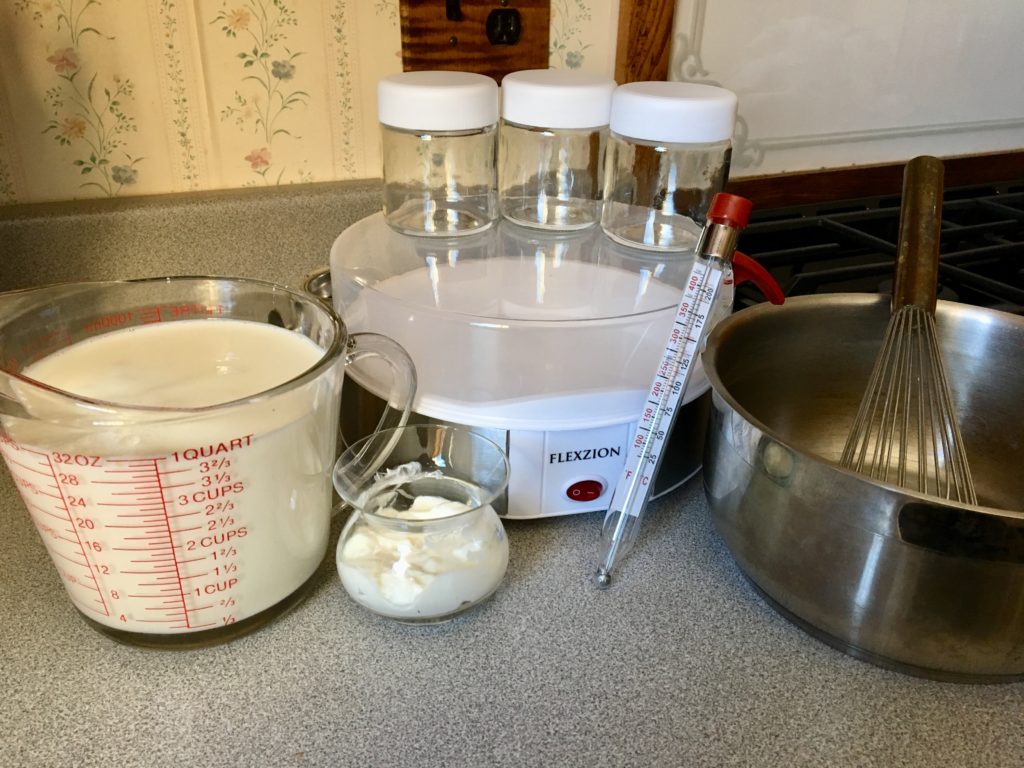
Begin by setting your yogurt maker upon a spot where it won’t be in the way for the next eight hours. Make sure your glass containers are clean and have lids for all of them. You will also need:
- 5 cups of whole milk. I use organic whole cow’s milk, but you can also use milk with less fat or goats milk if you’d like. The higher the fat content, the thicker your yogurt will be.
- 3 tablespoons of pre-made yogurt or a packet of commercial yogurt starter. You can get yogurt starter at most health food stores and in the health food department of select retailers. For my first ever batch I used store-bought organic plain yogurt. After that, I saved out the proper amount from my most recent homemade supply. Since yogurt will keep for about a week under proper refrigeration if that supply exceeds that time, I head to the store and purchase a small container of organic plain yogurt instead.
- A measuring cup
- A candy thermometer
- A sturdy metal pot
- A whisk
- A ladle
Yogurt making procedure
Ready to get started? Here’s how to make yogurt.
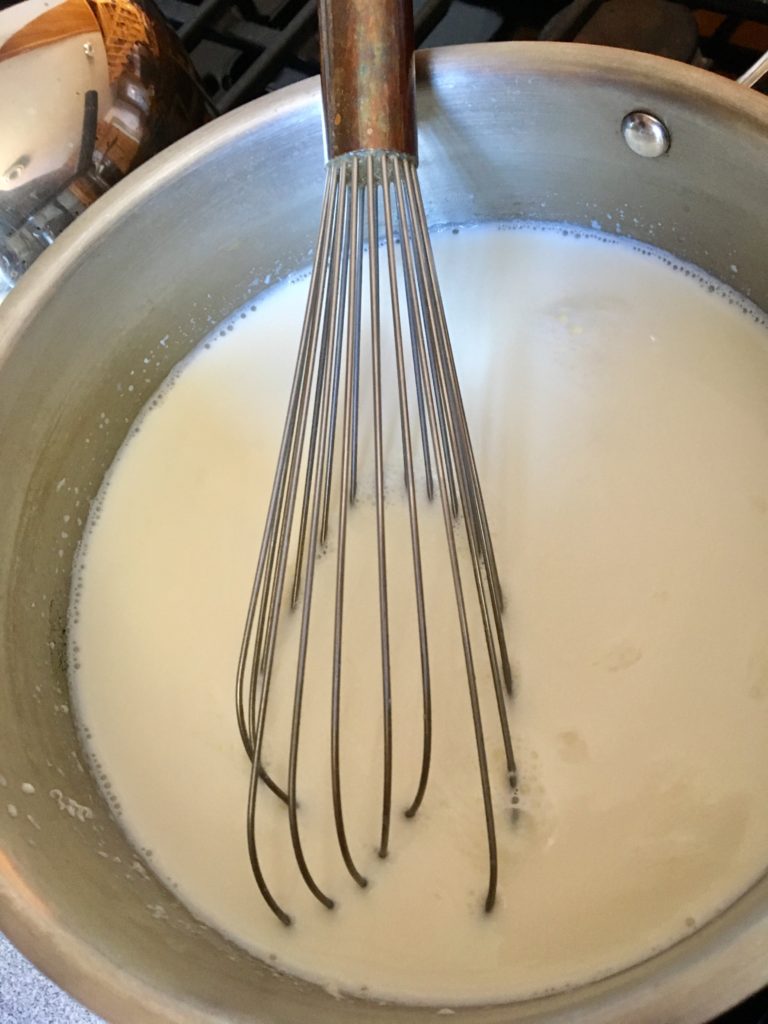
Begin by heating the milk on top of your stove in the metal pot. Take care to heat it slowly to prevent it from scalding. Heat the milk to 180-degrees Fahrenheit to kill off any bacteria or mold it may contain.
![]()
Heat the milk to 180-degrees. | Photo by Julia Bayly 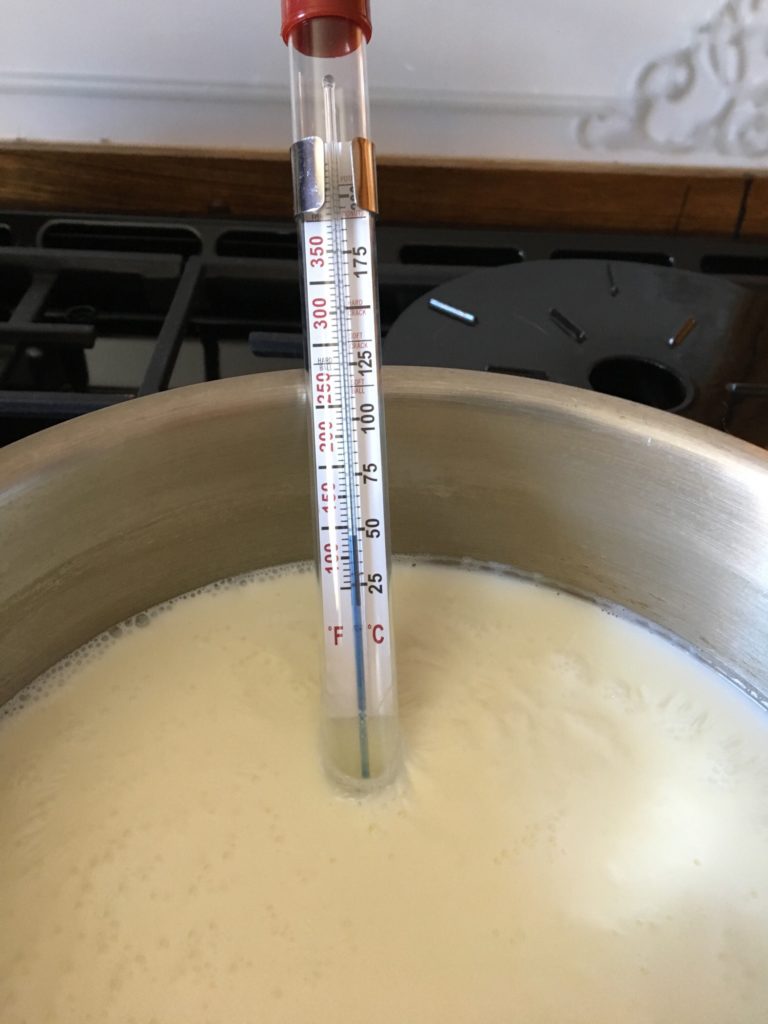
Then allow to cool to 112-degrees. | Photo by Julia Bayly
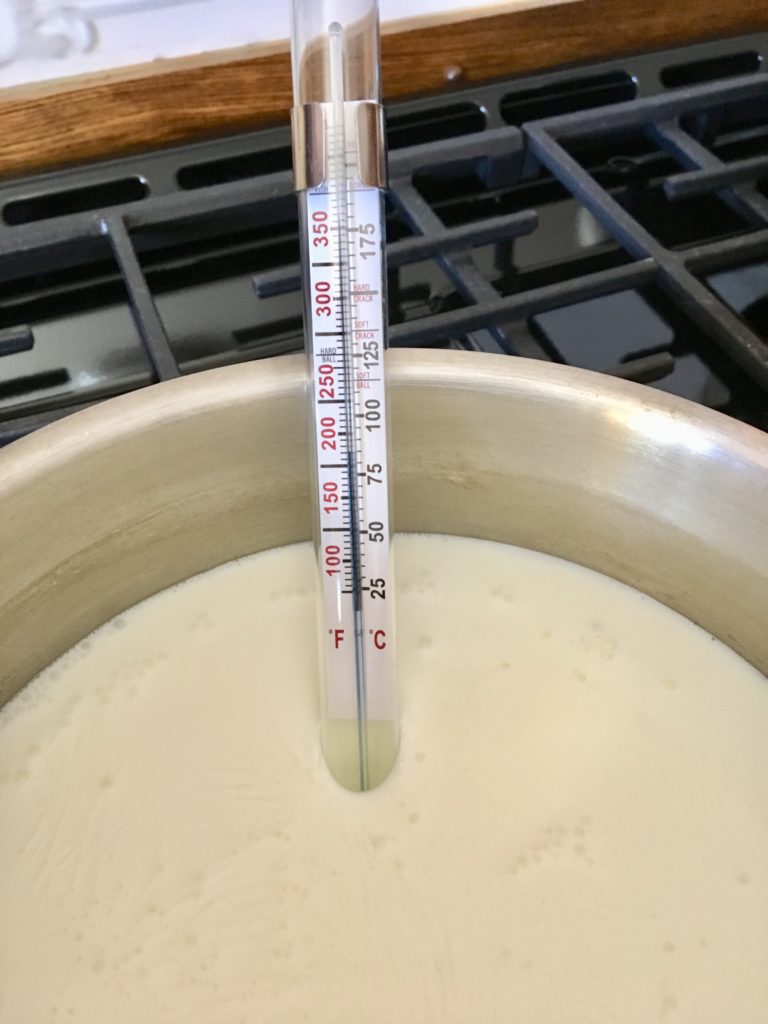
Once it hits 180-degrees, remove the milk from the heat and allow it to cool down to 112-degrees Fahrenheit. This creates a favorable environment for the good bacteria you are going to introduce in the form of the premade yogurt or starter.
When the milk has cooled, take out a cup of the liquid and to that whisk in the premade yogurt or starter.
Once it is thoroughly mixed, return it to the rest of the milk and whisk thoroughly to evenly distribute the yogurt or starter with the entire batch.
Ladle or pour the milk mixture into the glass jars, screw on the lids and place them in the yogurt maker.
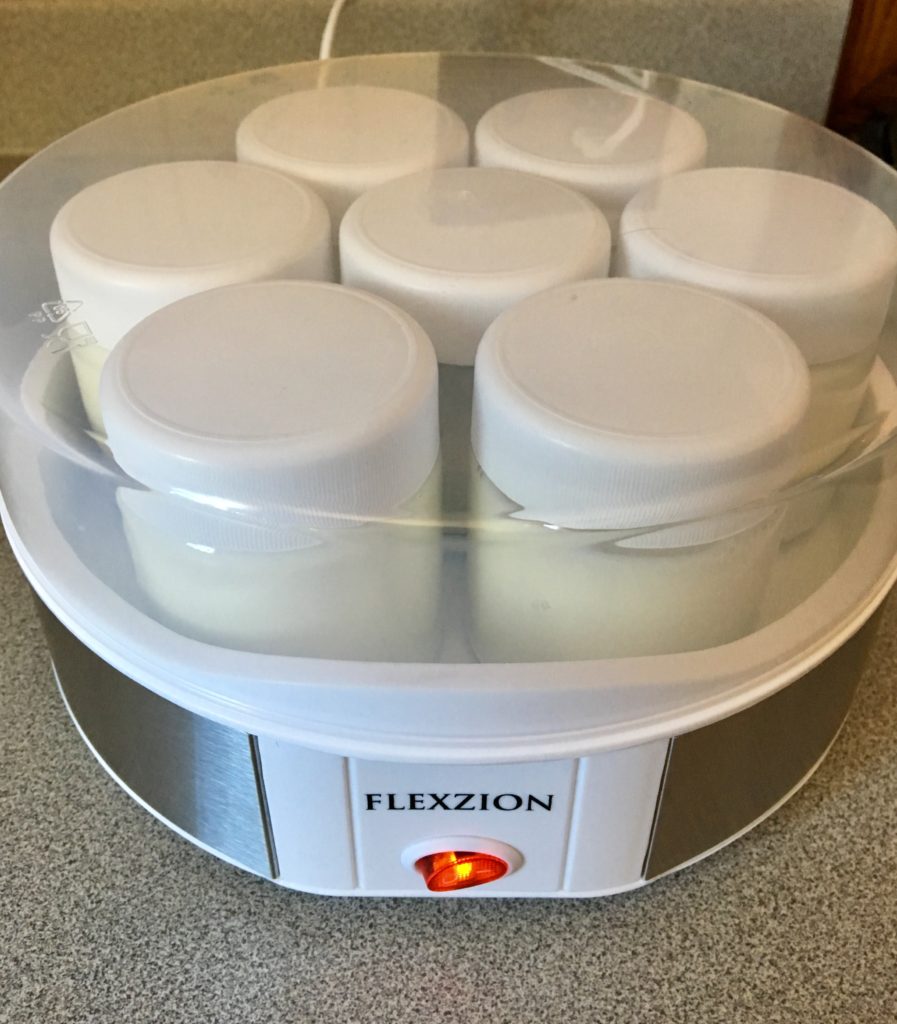
Place the cover on the machine, turn it on and walk away. The constant temperature supplied by the machine promotes the growth of good, healthy bacteria in your yogurt and the longer you let it sit, the thicker and tangier it will be. I find eight hours is the time needed to create what is for me the perfect consistency and taste. Beyond that, I have not noticed much change.
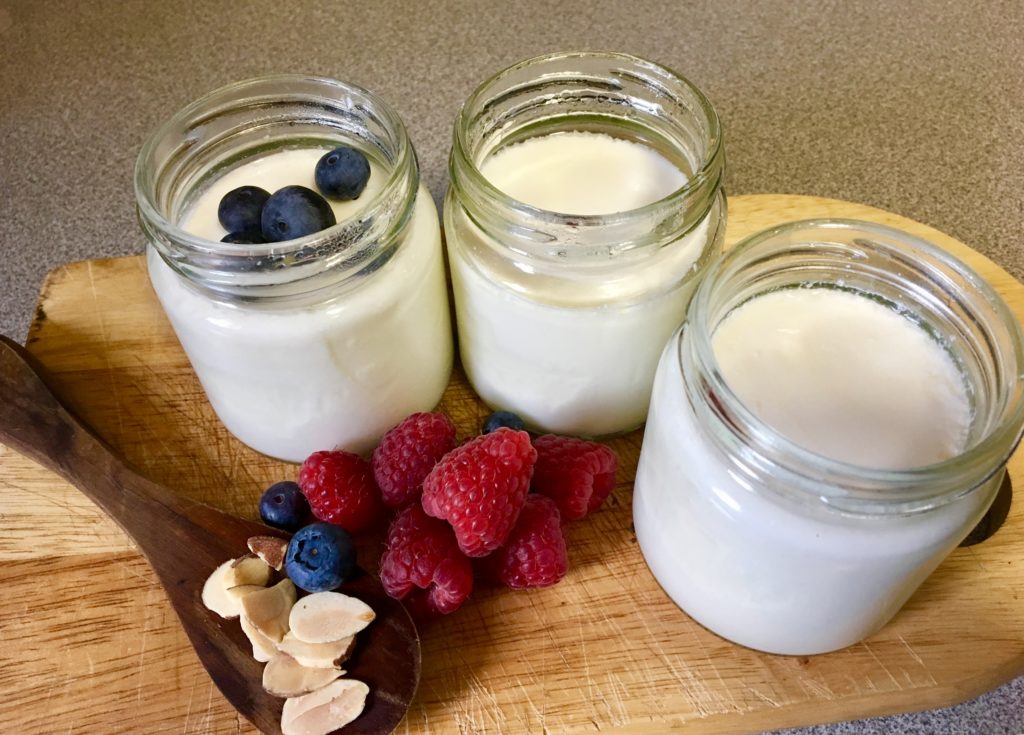
Remove the jars from the machine, place them in the refrigerator to cool and get set to enjoy the microbes of your labor!
It’s homesteading skills month on Hello Homestead! Every weekday this month, we’ll be highlighting