Growing microgreens for beginners

A flavorful and nutritious addition to many dishes, microgreens are often grown indoors. They don’t take up much space, and they’re ready to be harvested in a matter of days. So it’s no surprise that many gardeners have developed an interest in growing microgreens, a crop that can be cultivated year round.
“[Growing microgreens] is a great activity for anybody without a garden or with an interest in gardening but afraid to try with a big project,” said Bethany Marcello, a master gardener and educator with Penn State Extension. “It’s the gateway garden.”
Grown from seed, microgreens are simply vegetables, herbs and other edible plants, such as sunflowers, that are harvested early in life. Some popular plants to grow and harvest as microgreens are broccoli, peas, beans, radishes, mint and mustard greens. But there are plenty of other varieties. Gardeners are continually experimenting to see which plants produce tasty and nutrient-packed microgreens.
“I like arugula, particularly,” Marcello said. “It has a lovely, peppery bite and is great on a pizza. Sunflower shoots are also lovely. There’s something rich and almost salty about it, rather like a potato chip.”
Getting started with microgreens
There’s no one way to grow microgreens. Some people grow these tiny plants by spreading their seeds on soil, while others grow them on grow mats made of biodegradable materials, including wood fiber. Microgreens are also grown with hydroponic systems.
Regardless of what method is used, microgreens are typically grown indoors or under some type of shelter, such as a greenhouse or hoop house. This keeps conditions — such as humidity and temperature — consistent, which will allow you to better predict times for watering and harvesting. It also means that your delicate plants won’t be negatively affected (or destroyed) by weather events such as rainstorms.
“A lot of farmers will take advantage of shoulder seasons and grow [microgreens] when it’s not too hot in the greenhouse,” said Pamela Hargest, a horticulture professional with the University of Maine Cooperative Extension.
If growing microgreens indoors, you’ll likely need grow lights or a south-facing window where the plants can bask in natural light. However, there are exceptions, such as corn shoots, which grow in the dark from seed until harvest.
“You have to know each variety fairly well with their growth characteristics,” said Patrick Lewis, co-owner of Sprout House Microgreens in Falmouth, Maine.
Some seed companies provide information about specific plants and their characteristics as microgreens. For example, Johnny’s Selected Seeds provides an online microgreens comparison chart that includes average days until harvest, as well as brief descriptions of the appearance and flavor of each type of microgreen.
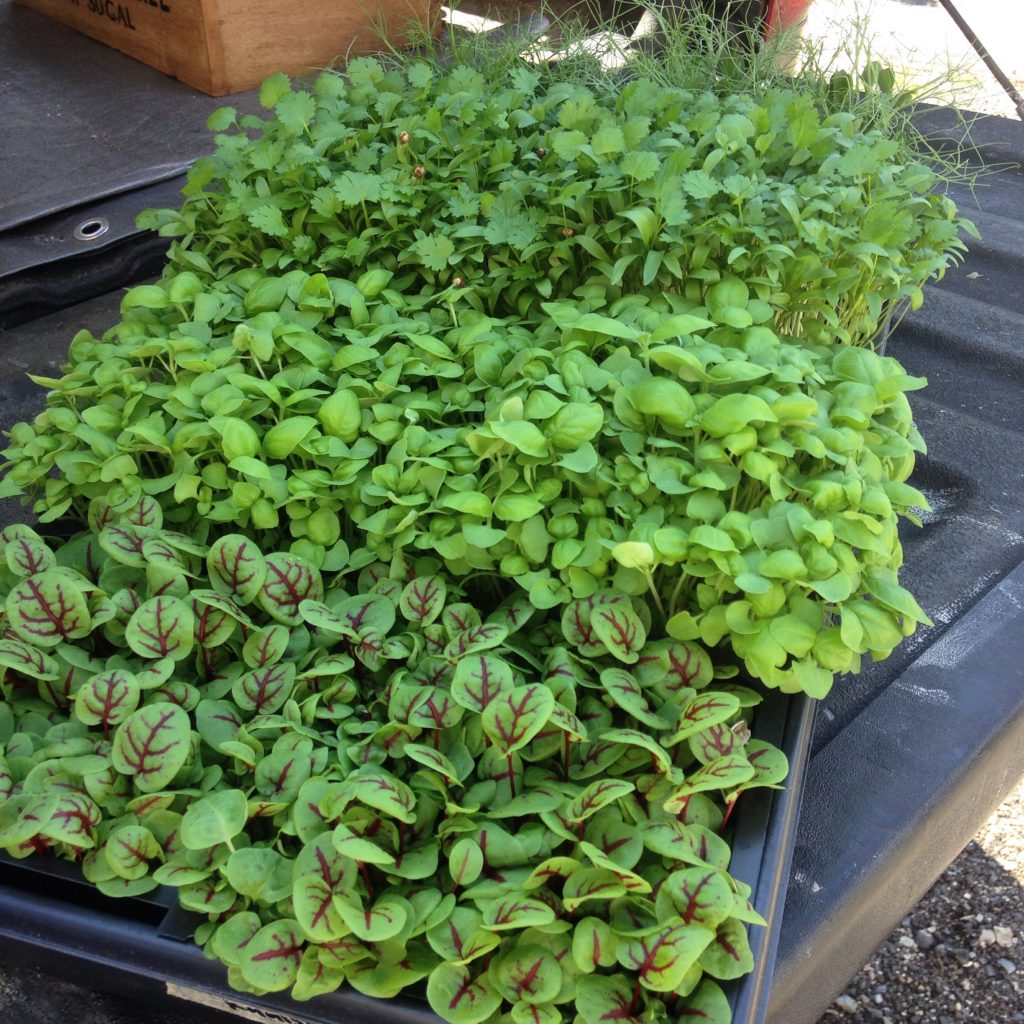
For example, the chart states that carrots are ready to harvest in 16-24 days; have feathery leaves; and have a “mild carrot” flavor. Red giant mustard, on the other hand, is usually ready to harvest in 10-15 days; produces green leaves with red veins; and tastes spicy.
How to grow microgreens
Once you’ve selected what varieties of microgreens to grow, it’s time to plant. The simplest way to do this is by filling shallow trays with soil, then sprinkling the seeds on top.
“You pretty much broadcast the seed on top of the soil,” said Hargest. “And you usually press the seed into the soil so you get good seed-soil contact.”
You can bury the seeds, like you would to grow seedlings, but this will result in the young plants being coated in dirt, which can be tedious to clean off after harvest. Also, by leaving the seeds on top of the soil, you have more room to harvest the microgreens close to their bases, Hargest said.
When sprinkling the seeds, keep in mind that they can be very close together because the plants are harvested when they are just a few inches tall. But don’t get too carried away.
“One thing that people tend to do is overseed them, put too many seeds in a tray, which can often cause mold issues because the plants are spaced too tight and there’s not enough air flow,” Hargest said. “So one of the challenges is figuring out how much to seed a tray or container. There are quite a few resources out there that give you an idea. I suggest going on the light side at first and getting a feel for the spacing they need.”
Once seeded, microgreens are usually covered with a lid or plastic bag, which will trap in humidity while the seeds germinate. Most seeds require darkness to germinate, while a few prefer light.
Once the plants have germinated and started to grow, the tray is usually placed under a grow light or placed in an area with natural light, and watered as needed.
“You really want to be careful not to overwater, just like when you start your seedlings inside,” Hargest said.
Many people prefer to bottom water microgreens, which involves pouring water into a grooved tray thats sits underneath the trays that hold the soil and seeds. The water is soaked up by the soil through drainage holes.
“It’s convenient and you get an even distribution of water,” Hargest said. “Some people gently water from the top, but I think bottom watering is best.”
Watering from the top could result in uneven water distribution in the soil, and it could cause the delicate microgreens to topple over. It could also contribute to mold growth. That said, plenty of people water microgreens carefully and successfully from the top.

How to harvest microgreens
There are different opinions about when you should grow microgreens. Some people harvest them right after their first leaves — or cotyledons — have appeared. Others wait until a few more leaves have opened, making the plant more recognizable. This second flush of leaves is often referred to as “true leaves” because they have the appearance of the plant’s adult leaves.
“It kind of depends on your market because some chefs will prefer them younger,” Hargest said. “There can be some variation.”
Harvest time can also depend on the plant type. For each variety you grow, you will want to do some research on the preferred time to harvest. Usually it’s when the plant has the most desirable appearance and flavor.
“For certain microgreens, there’s actually a very short window when the flavor is really good,” Hargest said.
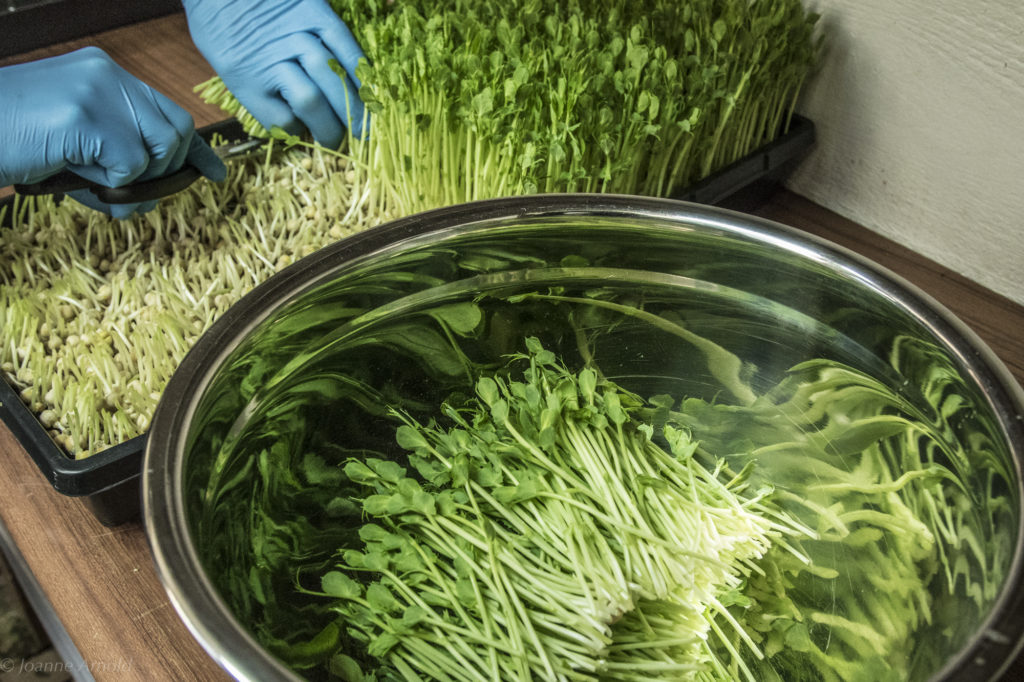
Microgreens can be harvested with sharp scissors, a harvesting knife or — for bigger operations — a miniature hedge trimmer. Using your chosen tool, you simply cut through the microgreen stems close to the soil. These cuts should be sharp and clean, without any dangling scraps of vegetation that will spoil quickly, Hargest said.
The seeds can then be tossed in the compost pile.
“The seeds are spent, so they won’t usually grow back,” Hargest said. “There are times when we’ve thrown the seeds in the compost and had full-sized beets grow. So for root crops, you might get a second round out of them.”
Store the microgreens in the refrigerator in a resealable bag or container. Their shelf life will depend on the type of plant they are. Most will stay fresh for a week or more.
Project: Growing microgreens in a container
Materials
- Seeds of the plant you’ve selected (broccoli, radish, sunflower, etc.)
- Soil
- Shallow seed trays with drainage holes
- A bottom watering tray that the seed tray(s) will fit into
- A transparent tray cover
- Scissors or a harvesting knife
- A light source
- A level surface to set your tray on
Directions
- Fill you seed trays with soil.
- Water the soil until it’s damp.
- Sprinkle the seeds over the soil. The seeds should be packed close together, however, the spacing will depend on the type of plant. Seed spacing for growing microgreens is much smaller than seed spacing for growing plants to their full size.
- Lightly press the seeds into the soil but do not bury the seeds.
- Cover the trays to lock in humidity for germination.
- Check on your seeds often. In a matter of days, they will start to sprout.
- Once they’ve started to grow, remove the tray cover and set them under your light source.
- Check on them often, and bottom water them when the soil is dry.
- After the plants develop their first true leaves, harvest them by cutting their stems close to the soil. The amount of time it takes for your microgreens to grow to this point will depend on the type of plant you’re growing.
- Toss the spent seeds in the compost. They usually will not produce again.
