
For my generation, staying in touch is mostly digital: sending DMs to college buddies on Instagram, lurking on high school classmates’ Facebook profiles or receiving the occasional email from that friend in the Peace Corps goodness-knows-where. Over the course of my young adult life, though, I have accumulated a few pen pals. I treasure all of these screen-free correspondences, whether they are postcards from old travel companions abroad or lined paper notes from my octogenarian hiking buddy in the California desert. But my favorite letters come on plantable paper, peppered with seeds from places I’ve been or want to go.
As the name suggests, plantable paper is embedded with seeds. The paper can be buried in soil and watered (a little more than you would a seed alone — it needs to work through its papery medium) until it sprouts. You can plant the paper for up to two years after the card is made.
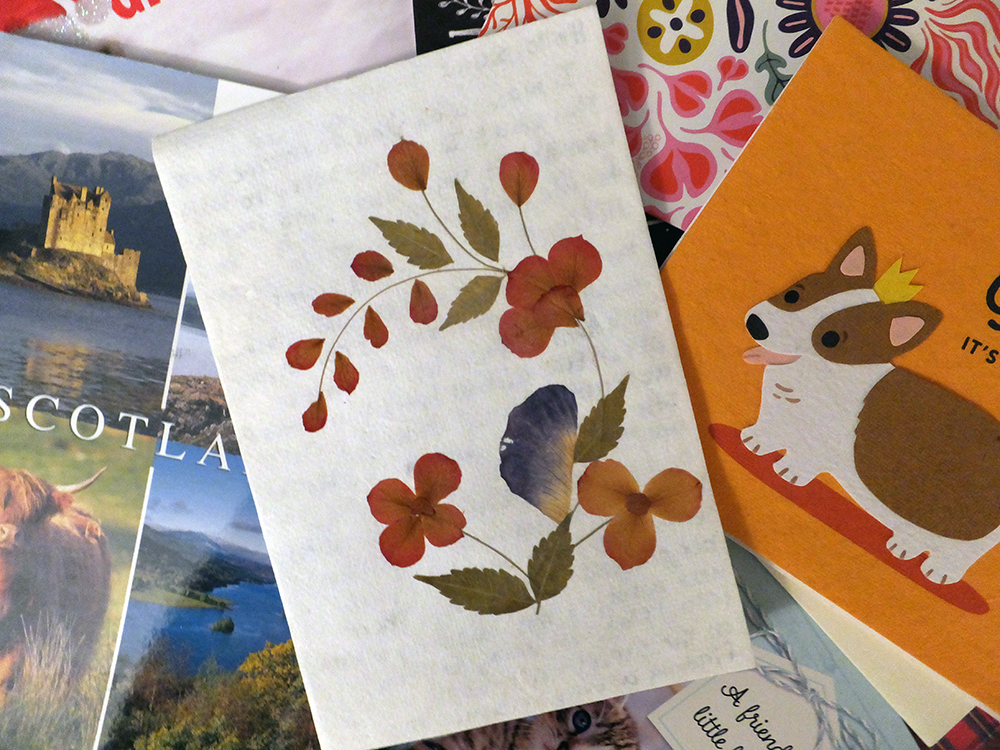
About a year ago, a pen pal of mine from San Francisco sent me a plantable paper card decorated with pressed flowers and embedded with violet seeds. I keep it in a box of all my letters and re-read it from time to time. I have a pot ready to plant it on my windowsill when I start feeling nostalgic for my days on the West Coast.
Because plantable paper is usually made from post-consumer, upcycled materials (cutting down new trees to just to embed it with seeds would sort of defeat the purpose, I suppose), the stationary has a rustic, earthy look that I, unsurprisingly, cannot resist.
When I learned that you can make your own plantable paper, I wanted to try it. Using a packet of seeds and my own discarded papers, my stationary could tell as much of a story as what’s written inside.
Learning to try
Before I committed to making cards, I wanted to test my plantable papermaking abilities. I found a DIY from The Spruce Crafts for plantable gift tags. The slightly-smaller tags seemed simpler, and the instructions were less complex than others I found. Also, I bought a cute set of animal cookie cutters at the thrift store that seemed perfect for the task.
I gathered my materials. Luckily, by dint of working at a daily newspaper and having a penchant for hoarding materials that I could possibly, maybe, perhaps reuse someday, I had plenty of my own “post-consumer” (I’m the consumer) paper to pulp.
I also chose a seed packet of pollinator-friendly, non-invasive flowers from Burpee. The choice was in part due to thrift — I already had the packet — but also because I am sensitive to the plight of the pollinators and wanted to make sure my plantable gift tags would not wreak invasive havoc wherever they grew.
A trying experience
In following the DIY instructions, I started my papermaking process by hand-shredding the paper to soak overnight.
The next day, the pre-pulped paper was sopping, but not as supple as I thought it would be. Still, I drained it and tried to use a hand blender to pulp it. Alas, my blending wand lacked the magic. The paper immediately clogged the blades, and I wasn’t making much headway in turning my mass of damp paper into pulp.
I brought out some bigger guns: a full-sized blender. I pushed aside thoughts that any smoothie I made from that point forward might taste a tiny bit like newsprint.
My risk did not yield any reward. Despite setting the blender to the highest liquifying speeds, the damp paper sat in my blender, unpulped.
As a last ditch effort, I broke out my trusty food processor and added a little bit of water to the paper strips. After several (hundred) passes and some diligent spatula work, I finally developed a pulpy substance. The texture seemed off — more like crunchy peanut butter than creamy — and the strange, gray slurry was not quite the antique off-white color of the store-bought plantable cards I had received from pen pals past.
I forged ahead. Maybe the color and texture would improve with the molding and drying, I thought. Besides, the cookie cutters were too cute to give up. I poured the packet of seeds into the mushy morass and gently stirred it in with my trusty spatula.
I pressed the squelching pulp into each cookie cutter and dabbed them with a rag to remove moisture. Then, I blasted my plantable paper menagerie with the hairdryer on cool (apparently, hot air may cause the seeds to germinate) for about half an hour. It was more of an arm workout than I anticipated when I started my plantable paper project.
I stopped when the paper changed color and felt dry to the touch. I removed the paper from the mold. Unsurprisingly perhaps, my animal-shaped plantable gift tags had no structural integrity and immediately started falling apart.
I held onto hope for my pulpy paper zoo. I waited overnight to see if they would dry out enough to be usable. No dice — my seal’s tail fell away as soon as I lifted it from the parchment paper. My other wildlife did not fare any better.
It was time to let go. I buried my plantable paper pets (though, at that point, they were mostly a pile of soggy pulp in my hands) in one of my patio garden boxes. Perhaps they still have a chance to grow into something beautiful.
My tried-and-true takeaways
I did not succeed in making plantable paper for my pen pals. Add me to the #PinterestFail Hall of Fame.
Upon reflection, I think I should have been more suspicious of this DIY’s simplicity. After a little research, I found that the pulping process generally requires more water (which I figured out on my own through experimentation) than the steps suggested. Most other papermaking DIYs also recommend using a mould and deckle, a frame-like apparatus that helps squeeze the water out of the pulp and give the paper its shape. I also should have left the tags to dry for longer — up to several days depending on the moisture level of my apartment.
I can’t blame the instructions entirely, though. Even though I loved my animal cookie cutters, I concede that a simpler mold probably would have been easier to start.
Given the amount of mess I had to clean up (and the grief of losing a camel cookie cutter in the process), I will probably be purchasing plantable paper instead of making my own for the foreseeable future. Even so, the experience of trying to make my own plantable paper gave me an even greater appreciation for the stationery I already loved.