How to transplant seedlings
Whether you started your seeds indoors or purchase them from a nursery, it’s nearing time to plant them in the ground. Here’s how to transplant seedlings.
According to Kate Garland, horticultural specialist at the University of Maine Cooperative Extension, best practice techniques depend on the plant that you are transplanting. Most plants will be transplanted at the same depth as they grew in the pots, but others, like tomatoes, should be buried a little deeper so that the adventitious roots, the proto-roots sprouting out of the stem that look like hairs, can grow in the soil.
“When we look at the tomato seedlings you’ll notice that the stems look hairy. Those hairs are the beginnings of potential roots. If that stem, those hairs, come in contact with the right environmental conditions, soil, right moisture conditions, they will develop into roots. If they stay above ground they won’t develop into any roots. Plant strategy to enhance its capability to absorb water and nutrient resources.”
Others still, like potatoes and leeks, need to be buried in trenches and continuously covered as they sprout upwards. Garland also said to keep in mind that transplanting for perennial plants is “completely different.”
Here are the basic steps to transplant seedlings into your garden this spring.
Preparing to transplant your seedlings
Before you transplant your seedlings, Garland said to make sure you harden them off, allowing them to build a tough cuticle layer to stand up against the elements. Do this by bringing them outside every day during the day for at least a week before you plan to put them in your garden.
Garland also said to make sure the soil is moist, but not too wet before you transplant your seedlings. Digging wet soil can compromise soil health over time.
“If you dig in the soil and it sticks to your shovel, take a step back,” Garland laughed.
Make sure you test your soil with your local cooperative extension and purchase the proper amendments for optimal soil health.
How to transplant vegetable seedlings
Start by removing the seedlings from the pot. Garland noted that regardless of what seedling you are transplanting, it is important to pick the plant up by the leaves instead of the stem.
“Plants can replace damaged roots and damaged leaves but young plants cannot replace a damaged stem,” Garland said. “Pick them up by leaves as much as possible.”
Garland suggested pinching the bottom of the pot in order to loosen the roots.
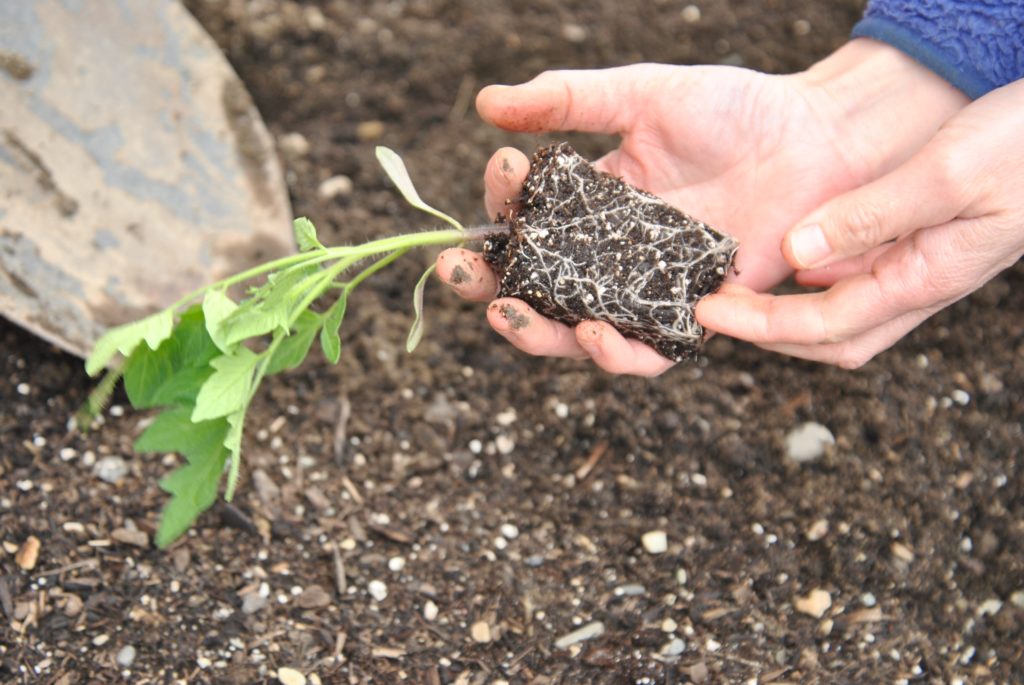
“I squeeze the pot a little bit and tip the pot upside down with my hand over pot,” Garland said. “Squeezing the bottom of the pot before it comes out will help it pop out more easily so that you’re not yanking up.”
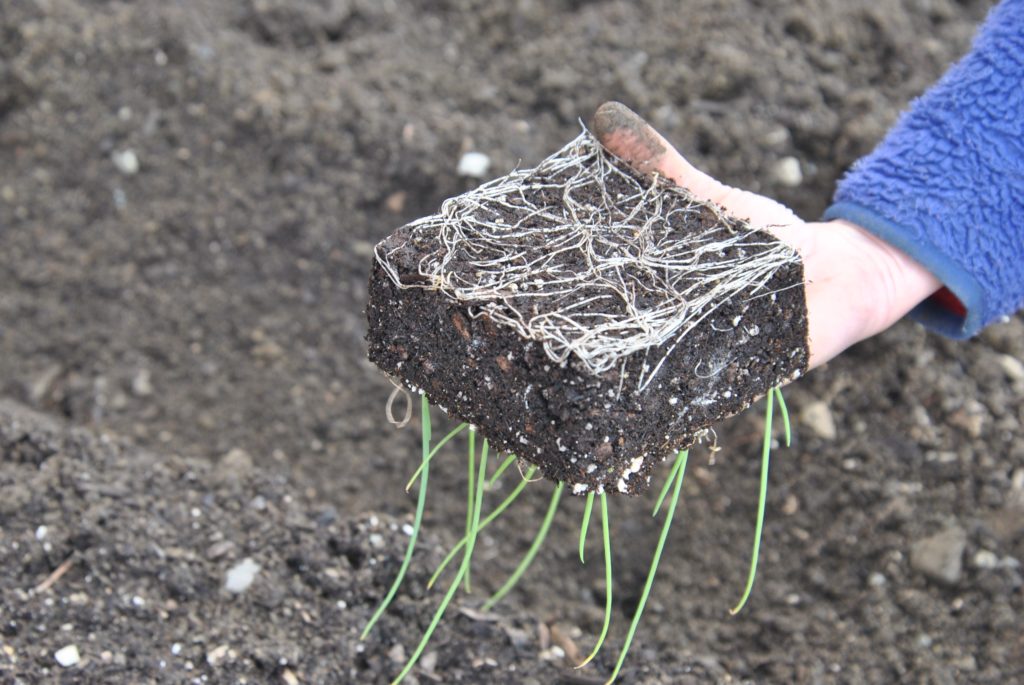
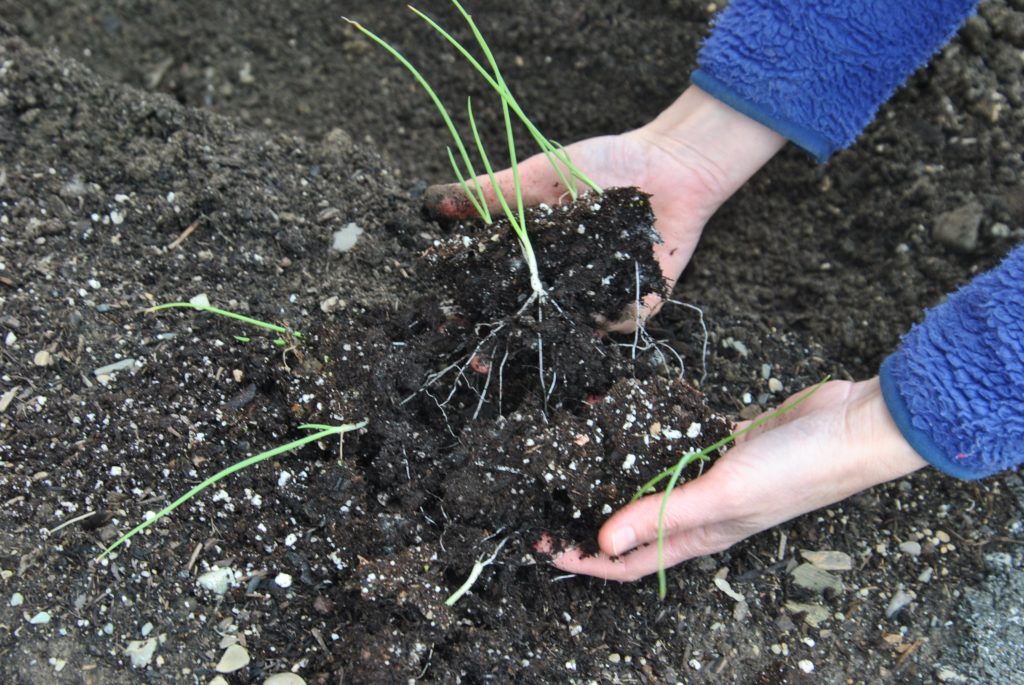
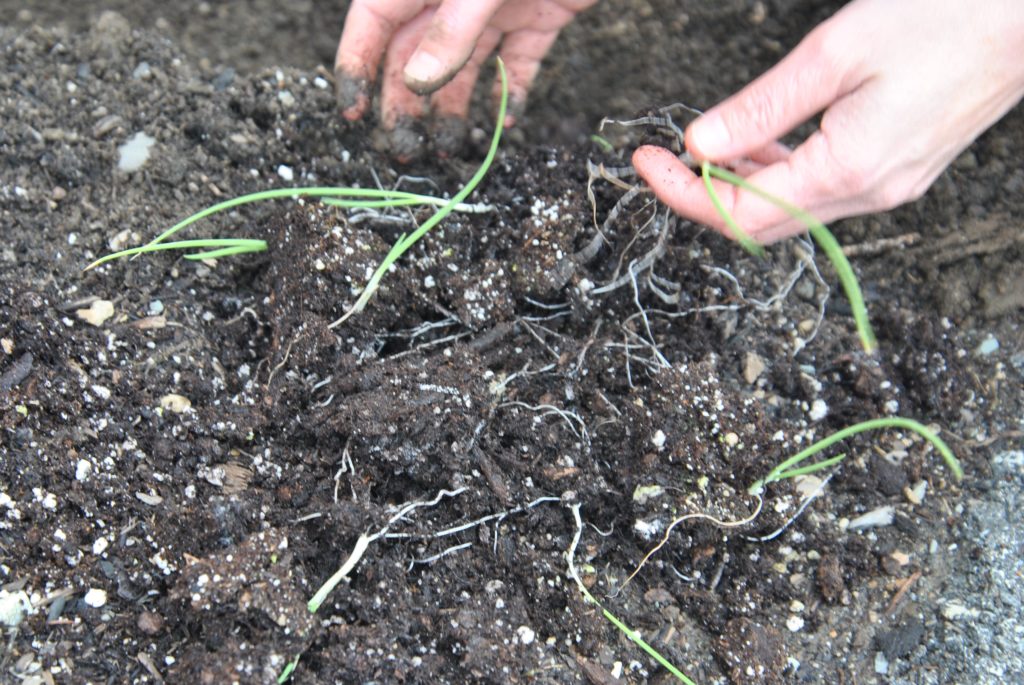
Once you have successfully extracted your seedling, tease and loosen the roots with your fingers.
“Plants have developed a pretty good root system, but sometimes that root system has gotten to a point where it is a little bit dense,” Garland said. “Use your fingers to tease the roots apart to give the plant a signal that it is out of the pot and it is time to start branching out and growing into its new home.”
Dig a hole about the depth of your pot. If you are planting tomatoes, dig an inch or two deeper to bury the base of the stem.
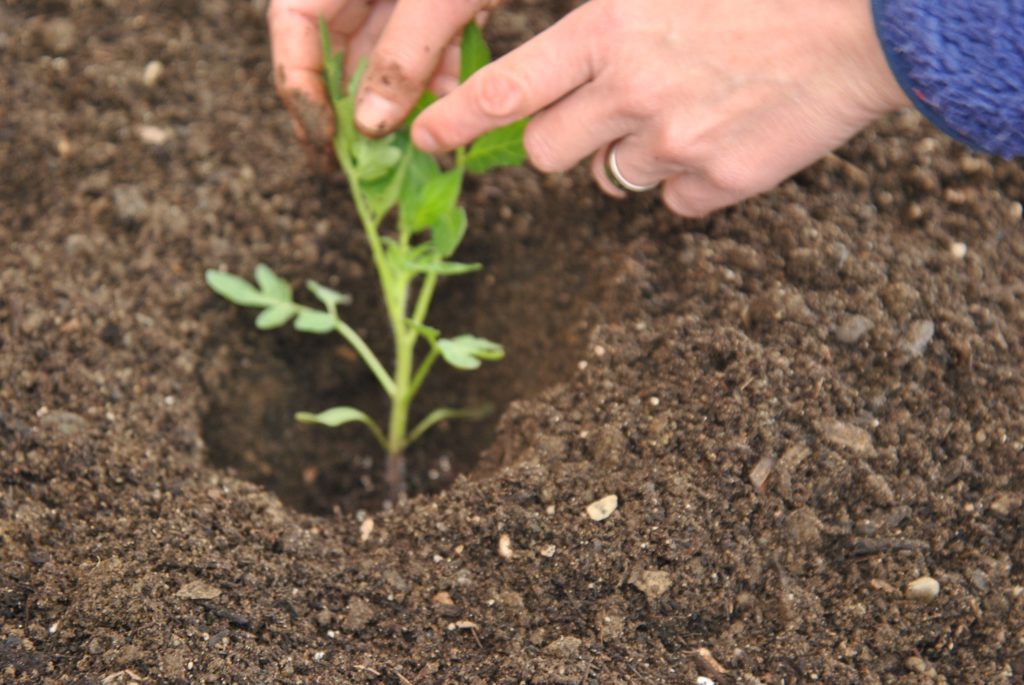
“You want to have at least two to three sets of true leaves above the ground, but other than that, the rest can be below ground for young seedlings,” Garland said. She added that if you do not have enough depth in your bed, you can also lay the tomatoes on their side.
Gently back soil around the seedling and water it thoroughly. Do not compact the soil with your hands.
“The more compaction you have the harder it is for the roots to get established,” Garland said. “Watering it in will help the roots make good contact with the soil.”
Transplanting onions and leeks
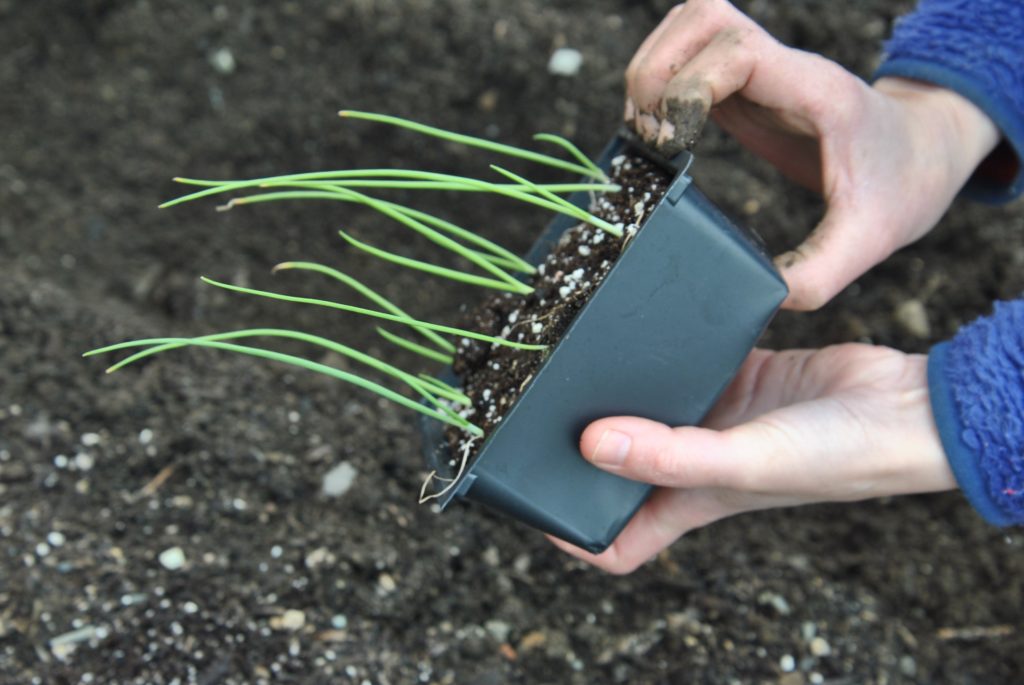
Transplanting onions and leeks is similar to transplanting other vegetables with a few key differences. These seedlings tend to come with multiple plants in the package’s cells, so they need to be separated before they are planted.
“Onions as a good example where you buy them in like a nine pack nine cells per package and you pop them out of a cell, usually two to three plants per cell, tease apart roots in order to transplant them and get them separated for transplanting.”
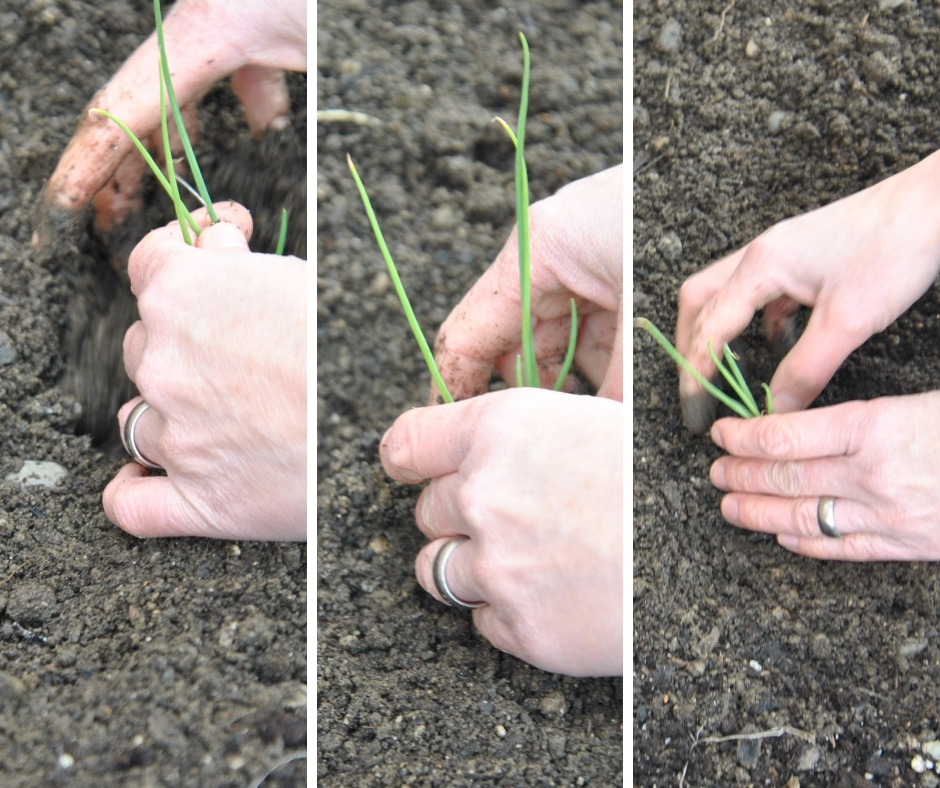
After you remove the seedlings from the package and tease the roots apart, use a dibble, a pointed tool used to make small holes for seedlings, to create a skinny, deep hole. You can use a dowel or purchase a special dibble tool, but Garland admitted she usually uses a thick marker.
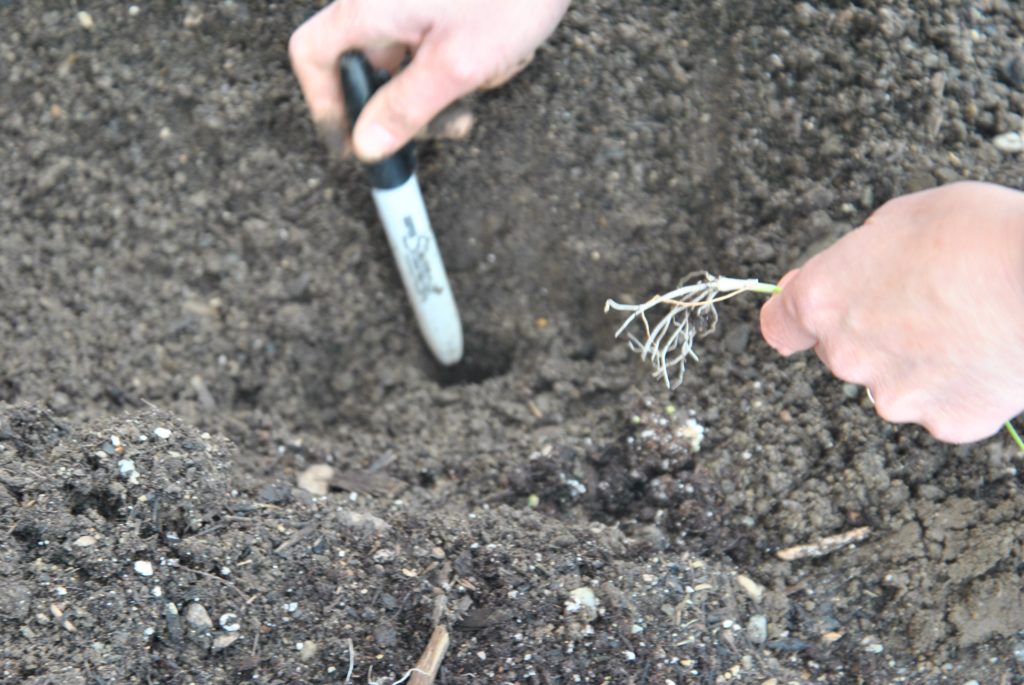
“It’s just something that makes a hole in the soil,” Garland said. “Make [the hole] nice and deep.”
Make sure the hole is deep enough for roots to go as straight as possible so that you are not cramming roots and preventing them from growing properly. Onions can be planted in groups of three. Use your fist to properly space between seedlings or bunches of seedlings.
“You want the roots to fall gently into the hole,” Garland said. “I don’t even pack the soil in around it. I water it in and the soil packs in naturally.”
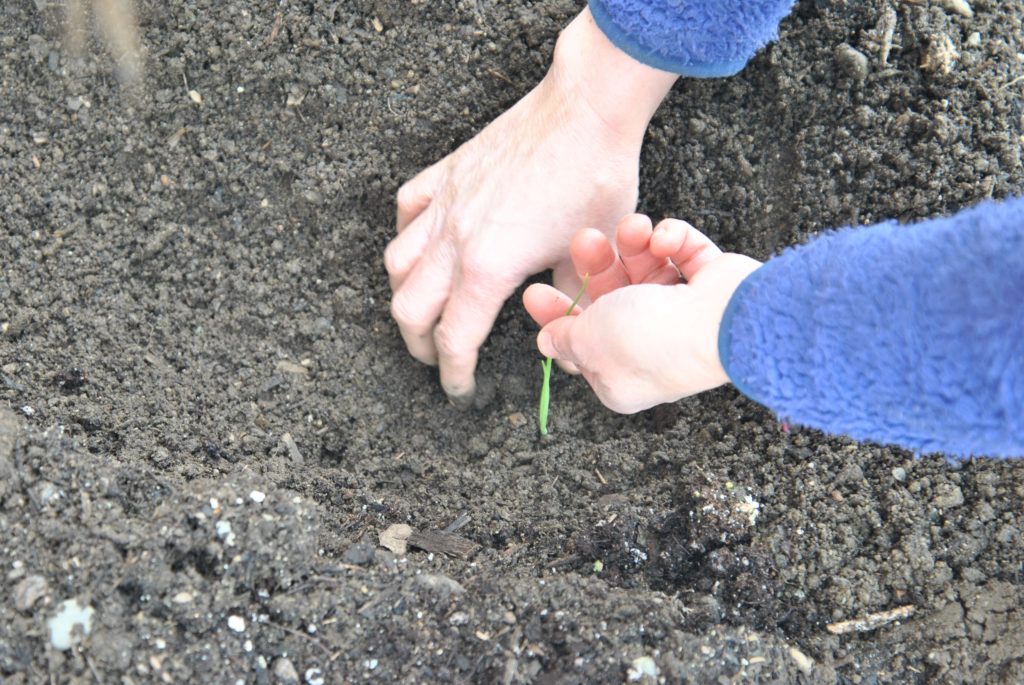
Leek seedlings look similar to onions and should also be gently placed into dibbled holes, but they the holes should also be bored in trenches several inches deep so that you can slowly back fill in and around the plant as it develops.
Helping your transplanted seedlings thrive
Once your seedlings are in the ground, Garland said to keep an eye on the watering.
“An inch a week is what most young seedlings need, and Mother Nature rarely gives us that throughout the growing season,” she explained.
It is also much easier to mulch, which will help the soil retain moisture in the soil and suppress weeds, while the seedlings are young.
“Depending on the type of seedlings you have, you can use a lot of different mulching strategies,” Garland said. “I oftentimes like using newspaper or other kinds of paper mulch. It provides weed barrier and helps keep moisture in around the plant.”
Your seedlings also might be susceptible to cutworms, nocturnal pests that bite through the stems of young seedlings, leaving the tops behind. Garland said that beans, peppers, cabbage, kohlrabi and broccoli
“It’s very discouraging for gardeners,” Garland said. “If you’ve had damage in the past that you suspect has been due to cutworms, preventative measures when plant seedlings, physical barriers around.
Garland suggested cutting off the bottom of a Dixie cup, cutting a slit down and middle, wrapping the open paper tube around the stem like a collar and nestling it down into the soil about half an inch. You can also use old toilet paper rolls for the same purpose.
“Once that plants are established, they are a lot less susceptible to cutworm damage,” Garland said. “It’s the tender, good stuff that cutworms are after.”
It’s homesteading skills month on Hello Homestead! Every weekday this month, we’ll be highlighting a skill for living a self-sufficient life. Make sure you LIKE our page on Facebook, FOLLOW on Twitter, FOLLOW us on Instagram and/or sign up for our newsletter so you don’t miss a single one!

